
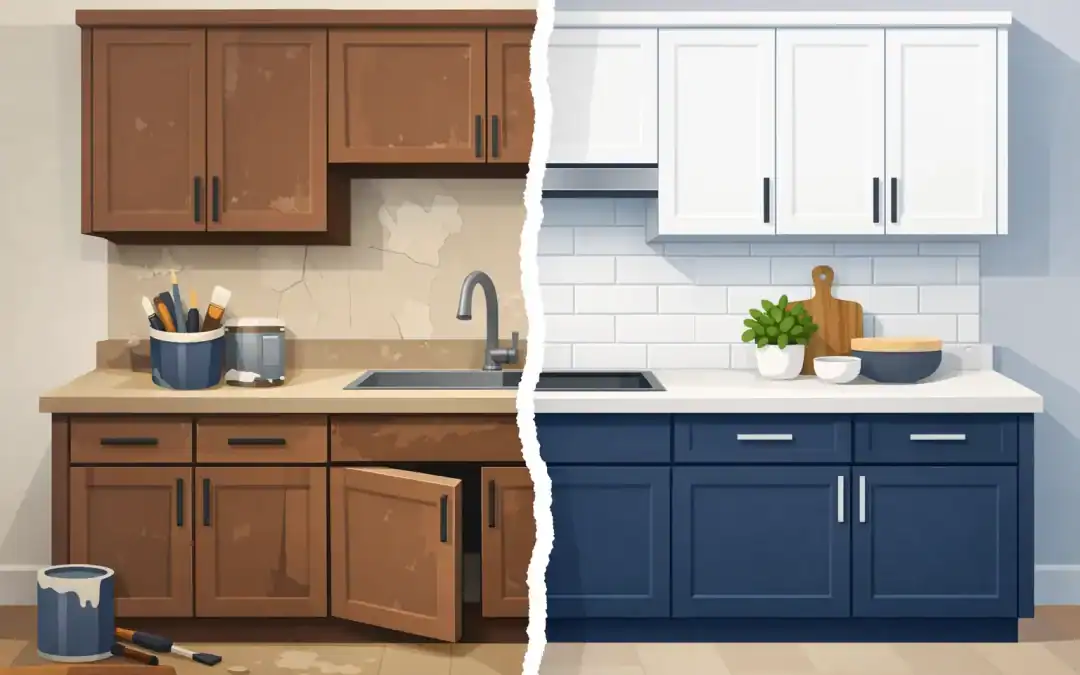
A kitchen can feel dated even when the layout still works perfectly. When homeowners search for a “cabinet makeover before after,” they are usually not looking for a quick coat of paint. They want to see how worn, orange-toned, scratched, or dark cabinets can become a clean, updated part of the home without the disruption and expense of a full kitchen replacement.
For many Pittsburgh-area homes, cabinet refinishing is a practical way to make a major visual change while preserving solid cabinet boxes, doors, and trim. The result depends less on the color selected and more on the condition of the cabinets, the preparation behind the finish, and the care taken through every stage of the job.
What Changes Most in a Cabinet Makeover Before-and-After
The most noticeable change is often the color, but color is only one part of the transformation. Older wood cabinets may have yellowed clear coats, uneven stain, worn edges around pulls, grease buildup near the range, and small dents from years of daily use. A professional refinishing project addresses those issues before a new finish is applied.
Light cabinet colors can make a compact kitchen feel larger and brighter, especially in homes with limited natural light. Soft whites, warm off-whites, greiges, and muted greens remain popular because they work with many countertop and flooring styles. Deeper colors can also make a strong impression. Navy, charcoal, and rich green lower cabinets can give an older kitchen a more tailored look when balanced with lighter walls or upper cabinets.
The before-and-after difference also comes from consistency. A new finish can make mismatched doors, drawer fronts, face frames, and decorative trim read as one intentional design. Fresh hardware, adjusted hinges, and clean lines complete the look, but the painted or refinished surface is what carries the project.
Refinishing vs. Replacing Cabinets
Replacement makes sense when cabinet boxes have serious water damage, failing construction, missing components, or a layout that no longer serves the household. If you need more storage, want to move appliances, or plan to change the kitchen footprint, new cabinetry may be the better investment.
However, many older cabinets were built from solid materials and remain structurally sound. In that case, replacing them can create unnecessary cost and a longer construction schedule. Refinishing allows homeowners to keep the cabinets they already have while changing the appearance of the room.
This is especially relevant in Pittsburgh’s older homes, where cabinetry may have been installed well and fitted carefully around uneven walls, original trim, or distinctive architectural details. A thoughtful cabinet makeover can update the room without stripping away its character.
The decision comes down to condition and goals. A contractor should inspect the cabinet surfaces, doors, joints, previous coatings, and areas around sinks and appliances before recommending a direction. A good result starts with an honest assessment, not a one-size-fits-all promise.
Preparation Is What Makes the Finish Last
Cabinet painting is not the same as painting a wall. Kitchen cabinets are touched constantly, exposed to cooking residue, bumped by chairs and dishes, and cleaned frequently. A finish that looks good on the first day but lacks proper preparation may chip, peel, or wear prematurely.
The process begins with protecting the kitchen and creating a clean work area. Counters, floors, appliances, backsplashes, and nearby rooms need careful coverage. Doors and drawer fronts are typically removed, labeled, and handled separately so each surface can be properly prepared and finished.
Then comes cleaning. Cabinet surfaces often hold oils, waxes, silicone residue, and years of cooking film that are not always visible. Those contaminants can interfere with adhesion, so thorough cleaning is necessary before sanding or priming begins.
Sanding helps dull the existing coating and smooth damaged areas. It is also the time to address small dents, scratches, nail holes, or minor imperfections. Not every mark needs to disappear completely, particularly on heavily grained wood, but surface repairs should be handled before the final finish goes on.
A suitable primer and cabinet-grade coating help create a hard, even surface. The correct materials vary based on whether cabinets are previously painted, clear-coated, stained, laminate, or made from another manufactured material. That is why a cabinet job should be evaluated individually. The right approach for solid oak is not always the right approach for a slick laminate door.
Choosing a Color That Works With the Room
A cabinet color should work with the elements that are staying. Before choosing a shade, consider countertops, backsplash tile, flooring, wall color, lighting, and the undertones in nearby woodwork. A bright white can look sharp in one kitchen and overly cool in another. A beige that feels warm under showroom lights may look dull against a gray countertop.
Testing samples in the actual kitchen is worthwhile. Look at them in morning light, evening light, and under the fixtures used most often. Pittsburgh’s cloudy winter days can make a color read differently than it does in a sunny room, so it helps to make the choice based on real conditions rather than a small paint chip alone.
For a lower-risk update, homeowners often choose a classic neutral for the main cabinets and bring personality in through wall color, hardware, lighting, or a contrasting island. If the kitchen has enough light and a simple layout, darker cabinet colors can add depth without making the room feel closed in.
Sheen matters as well. Higher sheens are easier to wipe clean, but they can make surface imperfections more visible. A professional can help select a finish that provides practical durability while fitting the look of the kitchen.
Realistic Expectations for Wood Grain and Wear
One of the most common questions in a cabinet makeover before-and-after project is whether wood grain will show through after painting. The answer depends on the species of wood, the depth of the grain, and the finish being requested. Oak, for example, has a pronounced grain pattern. It can be refinished beautifully, but achieving a perfectly smooth, furniture-like appearance may require additional filling and preparation.
That added labor can be worthwhile for some homeowners, while others prefer to retain a little natural texture. Neither choice is wrong. The key is knowing what the finished surface will realistically look like before work begins.
Likewise, refinishing can improve worn cabinet doors, but it cannot correct every structural issue. Warped doors, loose joints, swelling from prolonged water exposure, and broken hardware may need repair or replacement. Clear communication about those conditions helps avoid surprises and produces a better finished project.
Why Professional Application Makes a Difference
A cabinet makeover requires more control than a typical interior paint job. Clean masking, careful sanding, consistent coating application, dust management, and proper cure time all affect the final appearance. Rushing the process can leave brush marks, uneven coverage, rough surfaces, or paint that has not hardened enough for daily use.
Professional painters also manage the details homeowners tend to notice after the work is complete: clean edges at cabinet openings, properly reinstalled doors, aligned drawer fronts, protected countertops, and a tidy work area. The goal is not simply to change the cabinet color. It is to leave the kitchen looking finished and ready to use.
The Pittsburgh Painting Company has served local homeowners since 1978 with complete preparation, professional paint jobs, and careful cleanup. For cabinet refinishing, that same attention to detail matters from the first surface inspection through the final reinstallation.
Plan the Project Around Daily Kitchen Use
Cabinet refinishing creates far less disruption than a full replacement, but homeowners should still plan for limited kitchen access while the work is underway. Removing doors and preparing surfaces means the room may not function normally for a period of time. Allowing the finish to cure properly is also part of protecting the investment.
Before work starts, clear cabinet contents, remove countertop items, and set aside essentials you use every day. Discuss the schedule, work areas, ventilation needs, and access to the kitchen with your contractor. A clear plan makes the experience more manageable and helps the crew work efficiently.
A successful cabinet makeover is not about chasing a dramatic photo. It is about creating a kitchen that feels cleaner, brighter, and more comfortable to live with every day. If your cabinet boxes are solid but the finish no longer fits your home, a professional evaluation can show you what is possible before you commit to replacement.
Recent Comments